


To connect Tix camera to the PC you need to use the USB port of the camera and a USB to LAN converter.
Configuring network adapter
You can connect LAN cable from the camera directly to the PC, without any router in between. In this case camera IP address is selected automatically from the automatic private IP range: 169.254.0.1 through 169.254.255.254.
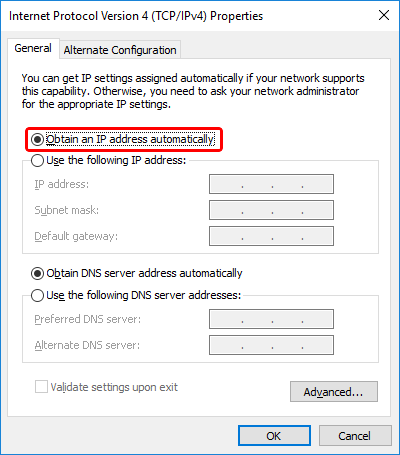
In order to communicate with the camera, your PC network adapter must be configured to use the same IP range (subnet). The easiest way to do it is to select "Obtain an IP address automatically" option in the TCP/IPv4 settings of the PC network adapter connected to the camera. In this case computer's IP address will be also selected in the same 169.254.X.X range.
Connecting to the camera
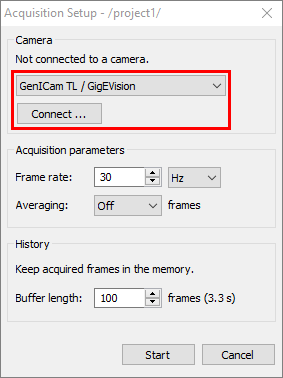
1.In IRT Analyzer open Acquisition Setup dialog by selecting main menu item 'Camera | Connect'. Chose 'GenICam TL / GigEVision' camera type and press 'Connect' button.
2.Select the camera you want to connect to and press 'Connect' button. If you do not see the camera in the list, you can try to update camera list by pressing 'Refresh' button.
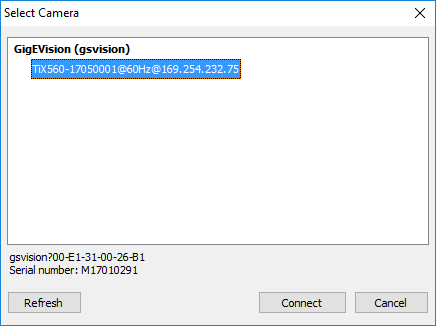
If you see text "unreachable" after the camera name this means that IP address of the camera does not match IP address of PC - PC and the camera are in different subnets. Connection will not be possible. Text "in use" after the camera name means that other PC or other program on your PC already established connection with the camera. This will also not allow you to connect. |