To make notations available for an image, some set of notations must be bound to the image folder or to a higher level folder. See Creating sets of notations or Assigning notations from the Notations Briefcase.
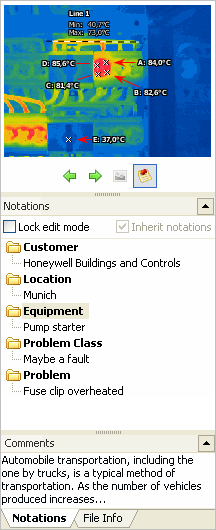
In the Organizer mode, the notations editor for images is located below the image preview window (or to the right from it). It shows notations of the active (selected) image.

If you have selected an image and do not see its notations, do the following steps to show it.
To show the notations editor for an image: 1.Make sure that the preview window is not hidden: check if there is a check mark near Windows | Preview item in the View menu. 2.Make sure that the information view is not hidden: check if there is a check mark near Windows | Infoview item in the View menu. 3.In the bottom part of the window where you see two tabs Notations and File Info, choose Notations. |
Modes of the Notations Editor for images
Display mode
If the keyboard focus is at another window, the notations window shows only the notations selected for this image.
Edit mode
To show all available notations and be able to select notations for an image, click on the notations editor window – it will go into the edit mode. To see all available notations all the time (no matter what window is currently active), place a check mark near Lock edit mode.
Extending notations
If the set of notations does not have the note you need for an image, you can add it. In this case, only this image will have the added note.
You can also add a comment that will contain information unique for the selected image. Comments section is under the notations in the notations window.
If you want a new notation to be available also for other images in the folder, you should add it to the folder notations sets. To do this, find Folder Notations icon in the same folder and double click to edit it. If there is no notations in this folder, create them using New | Notations for Folder in the folder context menu.

To clear image notations, click on a blank area in the notations window and choose Clear from the context menu. After you confirm the operation, all not inherited notations will disappear, and only the folder notations will remain.
Copying notations
You can copy an entire set of notations or only a specific category from one notations set to another.
To copy an entire set of notations, click on a blank area in the notations window and choose Copy from the context menu. Then select another image or folder and in its notations window choose Paste. So, the notations set will be copied from one image/folder to another. If the destination already has notations, new notations will be added to the existing notations.
To copy only one category, right click on the category and do the same Copy-Paste procedure.


